Within the target screen, you have the option to select from an extensive list of variables from which to target your audience. These options will change based on the market you’ve selected to ensure relevance. The first bucket contains basic Demographics such as age, gender, and region. The second bucket contains Profiles that can be used for more specific audience targeting. Profiles allow you to more precisely and efficiently reach your target audience. You can add them by dragging and dropping them into the targeting area. We also offer the ability to use custom targets in your quotas, should you want to target your audience on a variable that we do not already have profiled.
Variables can be added to the target by simply dragging and dropping the options needed from the left-hand pane beneath the quota section. Multiple variables can be added in layers, or quotas can be interlocked/nested.
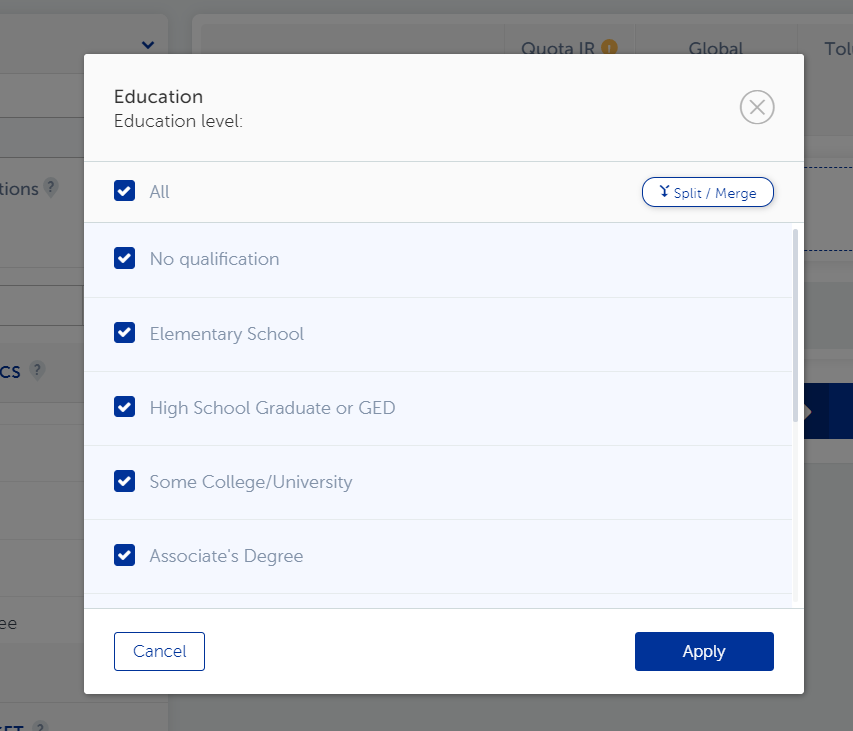
To interlock/nest variables, start by simply dragging and dropping the first variable you want to include in your nesting to the target area. Once the variable has been added, you will have the option to select the relevant response options or to merge options for broader targeting.
Once your first variable has been successfully added, simply select “edit layer” in the top right-hand corner of your target screen to add nest additional variables within your initial target.
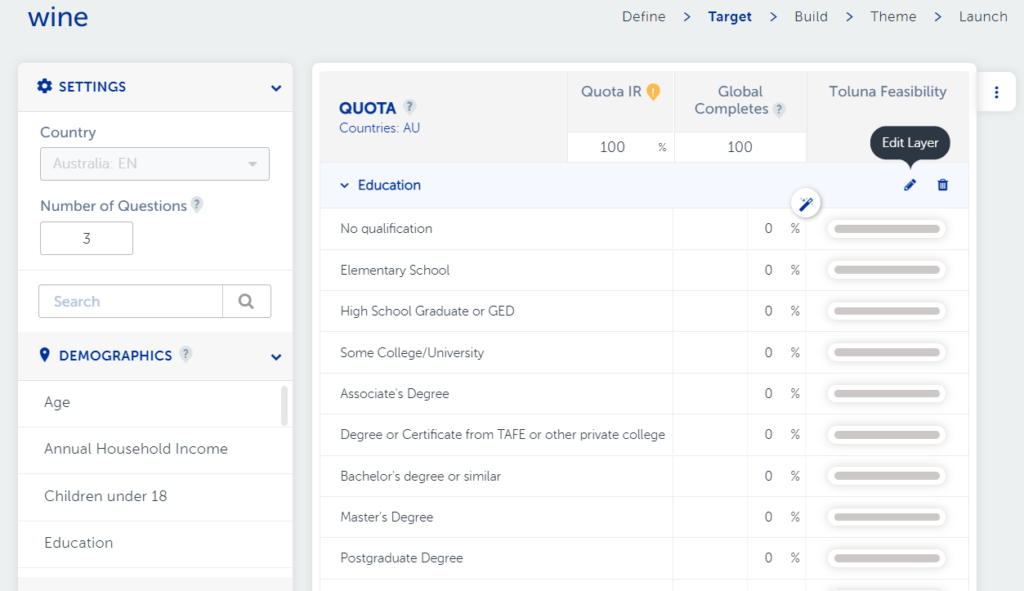
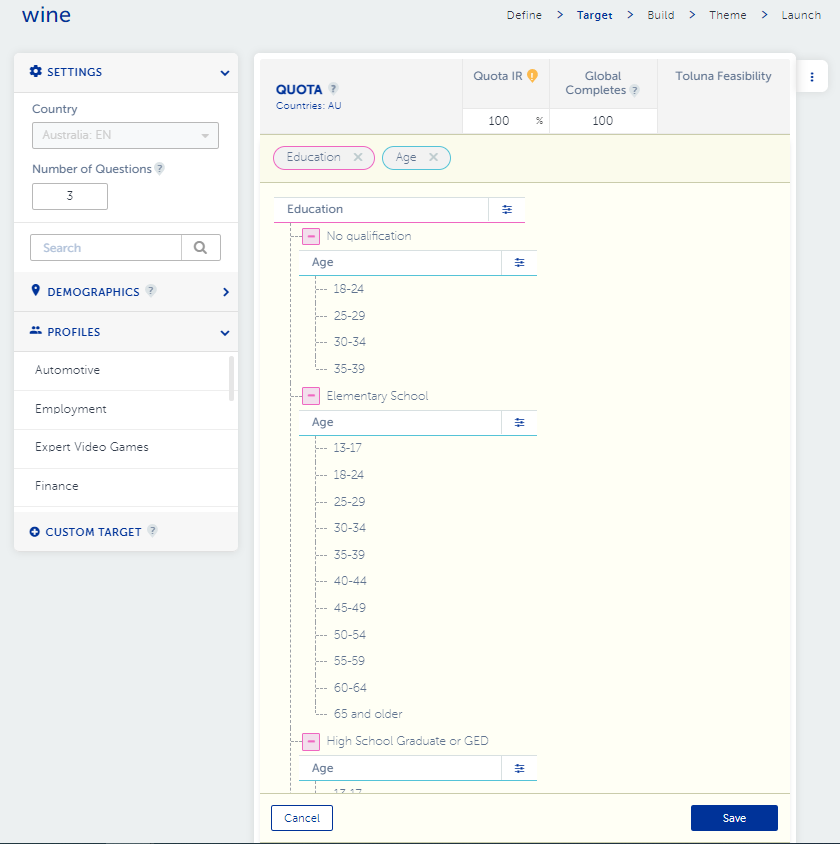
From here, drag and drop any additional variables that you’d like to nest within the center screen. The variables currently being used within the target are listed along the top of the editor. Each variable can be modified using the merge function as needed, and each individual quota can be modified to add, remove or merge variables individually as well. Technically, a maximum of 6 variables can be added to a quota, however, we often recommend less than this to ensure feasibility and project completion.
Note: When using random assignment in a custom survey or an automated solution it’s essential to use an interlocked quota in order to achieve the right application and result.
Once you are satisfied with the quota that has been set, select Save.
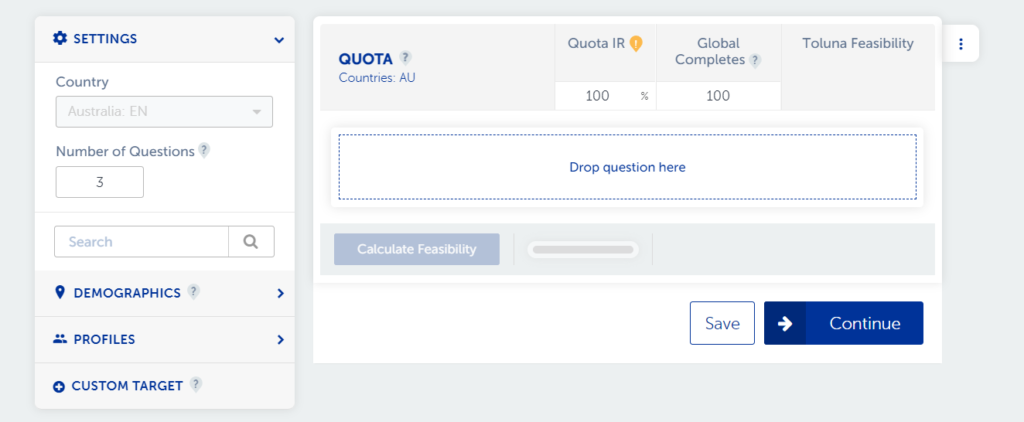
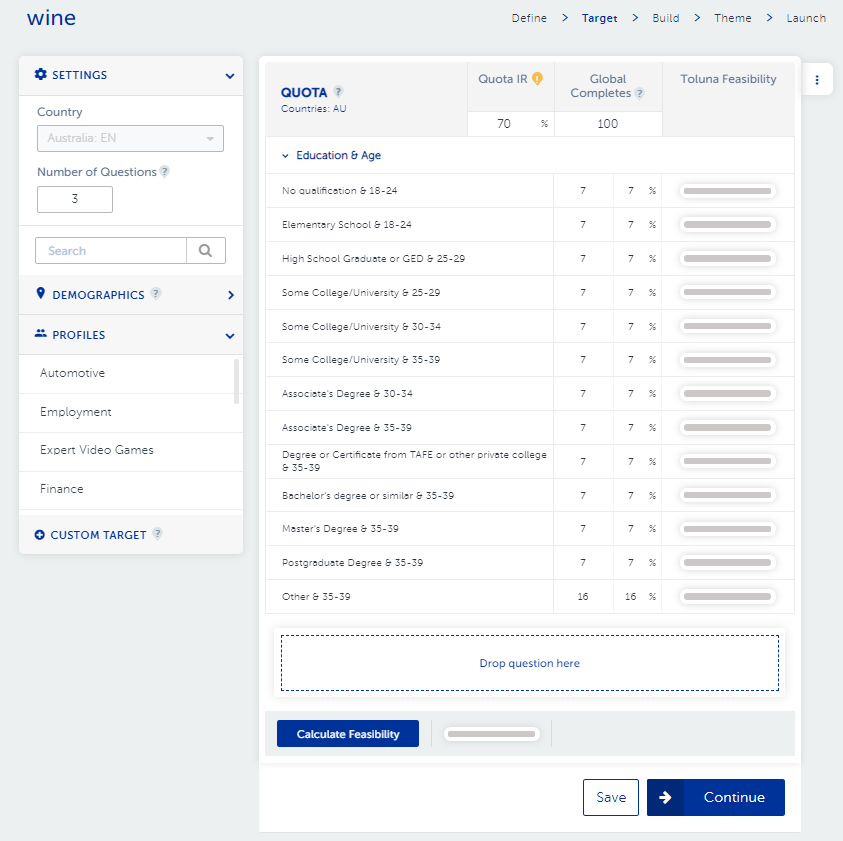
Next, enter the target you’d like to set for each quota. Use the magic wand function to evenly distribute completes across your quota cells, enter the values manually or set the percentage per target if the distribution is not even.
Enter your estimated target incidence and the number of completed interviews you’d like to receive.
If the quota/targets are feasible, you will get a green light to proceed along the bottom of the screen. If the system deems your project unfeasible, you will be warned so that alterations can be made before proceeding. Once you are all set, you can move on to the build of your questionnaire.
Questions on setting up interlocked quotas? Contact us.
Don’t have time to become a targeting pro? Let our team of experts assist you.
For more information on working within the Toluna Start platform, visit our resource center here.


 Back to Blog

